


E-commerce stores are online shopping stores that aid in trading without a third person. This tutorial will teach you how to build our e-commerce store on the Medusa backend.
Flutter is a cross-platform UI toolkit that is designed to allow code reuse across operating systems such as iOS and Android, while also allowing applications to interface directly with underlying platform services.
Medusa is an open source headless commence that allows users to build scalable and unique e-commerce stores and set up products seamlessly. It aids developers to build, manage and customize APIs fast and efficiently.
Medusa comes with a lot of features among which are, an easy-to-use admin panel, it is free to use, has lots of plugins for different operations, and a large community support.
This tutorial will demonstrate how to communicate with Medusa backend services from a Flutter application while building an e-commerce store. Medusa will handle our product creation. At the end of this tutorial, you will learn how to use Medusa to handle backend services.
Below is a link to the source code for the complete flutter app
github.com/iamVictorSam/my-store.git
Prerequisite
To follow this tutorial, you’ll need to have these binaries installed on your machine:
- Node and NPM: Node.js is an open-source, back-end JavaScript runtime environment that runs outside a web browser using a V8 engine and executes JavaScript code. Node can be downloaded using the Node.js download page.
- Flutter SDK: This is a command-line tool for creating and running flutter Flutter projects. Visit https://flutter.dev/docs/get-started/install to install Flutter SDK. This tutorial will use the latest Flutter version 3.0
- Git: This is a DevOps tool used for version control and code management. Visit https://git-scm.com/download to download git to your device.
Setup workspace for Medusa
Install Medusa CLI
Before running the Medusa server, first, install the Medusa cli. This gives access to the Medusa server. Run the command below in the terminal.
npm install -g @medusajs/medusa-cli
Create Medusa server
Once done, run the command below.
medusa new flutter-store --seed
The command above sets up the server project and also installs the required dependencies. The --seed flag at the end of the command creates a default store with demo products.
To upload product images, a File service like MinIO, S3 or DigitalOcean Spaces needs to be installed on the Admin.
Running Medusa server
Once the above command is done installing all the required Medusa packages, your server is ready for testing! First, change it to the directory to the project folder by running the command below.
cd flutter-store
Finally, run the server using the develop command.
medusa develop
The above command will run your server on localhost:9000/ by default.
Install Medusa Admin
It’s time to start creating some products, but before proceeding, let’s set up an Admin panel.
Medusa has a pre-built admin panel that helps in the creation and modification of products, customers, orders, coupons, gift cards, and many more.
To install Medusa Admin, clone the Admin repo from github
git clone https://github.com/medusajs/admin my-admin
After cloning, change the directory to the my-admin directory using the command below.
cd my-admin
Once in the directory, run the command below to install the necessary packages needed to get the admin panel up and running.
npm install
Launch the Admin panel
Once all the dependencies and packages are downloaded and installed properly, run the command below to launch the Admin panel in your browser.
N.B.: You have to keep the Medusa server running to be able to use the admin panel.
npm start
The above command will build and run the admin panel in your browser on localhost:7000 by default.
Log in, using the email admin@medusa-test.com and password supersecret.
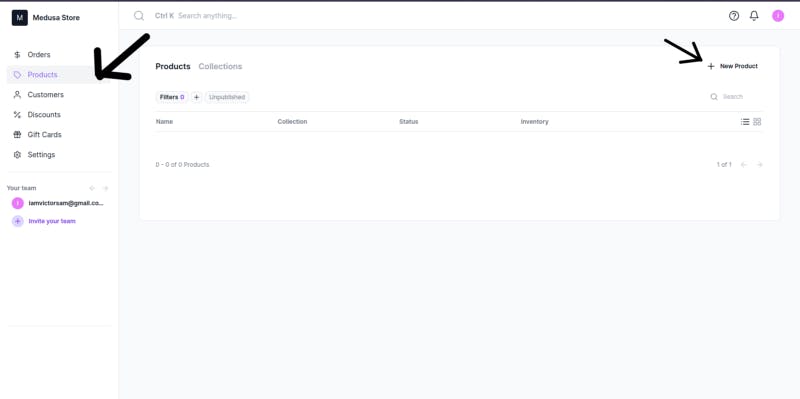
Creating our Custom Product
Go to the Products tab and click on New Product in the top right corner of the dashboard to create a Product.
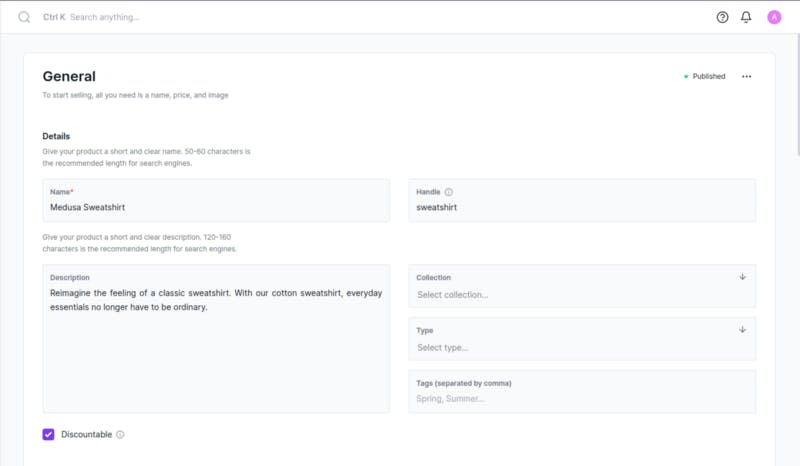
Create as many products as you wish, then hit the Publish button to get them live.
Setup workspace for Flutter App
We have successfully published many products to our admin panel. Let’s build our application to test our API.
Create Flutter App
Run the command below in your preferred directory to create a flutter app
flutter create my_store
Installing Packages
We’ll be using some flutter packages for this tutorial
- http: This is a network package that aids in HTTP consumption and network calls
- get: Get is a Flutter state management package.
- animated_splash_screen: This will handle our splash screen with animations.
Let’s update our pubspec.yaml file by importing the packages above.
name: my_store

description: A new Flutter project.

publish_to: "none" # Remove this line if you wish to publish to pub.dev

version: 1.0.0+1

environment:
  sdk: ">=2.17.0 <3.0.0"

dependencies:
  flutter:
    sdk: flutter
  cupertino_icons: ^1.0.2
  get: ^4.6.3
  http: ^0.13.4
  animated_splash_screen: ^1.2.0

dev_dependencies:
  flutter_test:
    sdk: flutter
  flutter_lints: ^2.0.0

flutter:
  uses-material-design: true
Run the flutter pub get command to install the packages locally.
Folder Structure
Let’s take a look at how our folder and file structure will be in this project.
📦lib
 ┣ 📂api
 ┃ ┣ 📜base.dart
 ┃ ┗ 📜products_api.dart
 ┣ 📂controller
 ┃ ┗ 📜productController.dart
 ┣ 📂model
 ┃ ┗ 📜product_model.dart
 ┣ 📂screens
 ┃ ┣ 📂details
 ┃ ┃ ┣ 📂components
 ┃ ┃ ┃ ┣ 📜product_price.dart
 ┃ ┃ ┃ ┗ 📜product_size.dart
 ┃ ┃ ┗ 📜product_details.dart
 ┃ ┣ 📂home
 ┃ ┃ ┣ 📂components
 ┃ ┃ ┃ ┣ 📜products.dart
 ┃ ┃ ┃ ┗ 📜product_card.dart
 ┃ ┃ ┗ 📜home.dart
 ┃ ┗ 📜splash_screen.dart
 ┗ 📜main.dart
- api: This folder contains the
api.dartfile that we'll be using to make API calls and thebase.dartthat contains our Base URL. - controller: This contains the dart file for our state management
- model: The model folder holds the model file that we’ll be using to map our json response.
- screens: The screen folder handles all our user interfaces. It contains two folders namely:
- splash_screen.dart: This handles the app logo and animation
- home: This folder contains the home user interface of our app and its components.
- details: This comprises of our product details screen and its components.
main.dart: This is the entry point to our application. It contains the runApp() function which launches the MyApp Widget.
Components are a simple functional part of the main widget or design. They help in ensuring clean, dry, and readable codes.
Building Splash Screen
Before we head on to build our Splash screen, let’s clean up our lib/main.dart file by removing the MyHomePage and _myHomePageState widgets and replacing the MyApp widget with the code below.
import 'package:flutter/material.dart';
import 'package:get/get.dart';
import 'package:my_store/screens/splash_screen.dart';

void main() {
  runApp(const MyApp());
}

class MyApp extends StatelessWidget {
  const MyApp({Key? key}) : super(key: key);
  // This widget is the root of your application.
  @override
  Widget build(BuildContext context) {
    return GetMaterialApp(
      title: 'Medusa Store',
      debugShowCheckedModeBanner: false,
      theme: ThemeData(
        primarySwatch: Colors.blue,
        useMaterial3: true,
      ),
      home: const SplashScreen(),
    );
  }
}
Based on the code above, we are using the GetMaterialApp from the get package for our material design. This gives us access to the get’s navigation and state management. We are also enabling Flutter’s new useMaterial3 design, then finally routing to our first screen, which is the Splashscreen. It’s ok to see an error on SplashScreen since it hasn't been created.
Splash Screen
The Splash screen is a fancy 2.5seconds display screen that gives our application a nice aesthetic intro.
Adding logo file
Create a folder called assets in the project’s root folder and add the logo.png image to it. Head over to the pubspec.yaml file and update the assets property with the image path as done below.
...

flutter:
  uses-material-design: true
  assets:
    - assets/logo.png
Create a splash_screen.dart file in the lib/screens folder and paste the code below
import 'package:animated_splash_screen/animated_splash_screen.dart';
import 'package:flutter/material.dart';
import 'package:my_store/screens/home/home.dart';

class SplashScreen extends StatelessWidget {
  const SplashScreen({Key? key}) : super(key: key);
  @override
  Widget build(BuildContext context) {
    return AnimatedSplashScreen(
      duration: 2500,
      splash: 'assets/logo.png',
      splashIconSize: 300,
      nextScreen: HomeScreen(),
      splashTransition: SplashTransition.fadeTransition,
      backgroundColor: Colors.black,
    );
  }
}
The code above is responsible for our splash animation. This takes place for 2.5seconds with a nice faded animation that displays our logo on a black background and then routes to HomeScreen. After pasting the code snippet above.
StatelessWidgets are static widgets in Flutter that hold no state in them. They can’t be re-rendered or manipulated by user interaction, while StatelessWidget can be re-rendered at runtime by user interaction and activity.
Setting up Model
The Home Screen is responsible for displaying our products to users. But before we start displaying products, let’s create a model that will map responses from our http call.
Creating our model
Create a product_model.dart file in the lib/model folder and paste the code below
import 'dart:convert';

class Products {
  Products({
    required this.id,
    required this.title,
    required this.description,
    required this.thumbnail,
    required this.variants,
    required this.options,
    required this.images,
  });
  String id;
  String title;
  String description;
  String thumbnail;
  List<Variant> variants;
  List<Option> options;
  List<Image> images;
  factory Products.fromJson(Map<String, dynamic> json) => Products(
        id: json["id"],
        title: json["title"],
        description: json["description"],
        thumbnail: json["thumbnail"],
        variants: List<Variant>.from(
            json["variants"].map((x) => Variant.fromJson(x))),
        options:
            List<Option>.from(json["options"].map((x) => Option.fromJson(x))),
        images: List<Image>.from(json["images"].map((x) => Image.fromJson(x))),
      );
}
The variants, options, and images property containers data on their second level unlike the thumbnail, title, id, and the description properties whose data is in their first-level. To get our values from the second level, we’ll need to create a separate class for each still in this model.dart file.
Still in the product_model.dart file, paste the following code blocks below the factory method above.
class Image {
  Image({
    required this.url,
  });
  String url;
  factory Image.fromJson(Map<String, dynamic> json) => Image(
        url: json["url"],
      );
}
Based on the code above, we are getting our image url from the second class thus, mapping it to the image class still in the model file.
class Option {
  Option({
    required this.title,
    required this.values,
  });
  String title;
  List<Value> values;
  factory Option.fromJson(Map<String, dynamic> json) => Option(
        title: json["title"],
        values: List<Value>.from(json["values"].map((x) => Value.fromJson(x))),
      );
}

class Value {
  Value({
    required this.id,
    required this.value,
  });
  String id;
  String value;
  factory Value.fromJson(Map<String, dynamic> json) => Value(
        id: json["id"],
        value: json["value"]!,
      );
}
Based on the code above, the Value class is modeled into Option class to give it access to the third-level data. Here we are trying to grab the Size property for our products.
class Variant {
  Variant({
    required this.id,
    required this.title,
    required this.prices,
    required this.options,
  });
  String id;
  String title;
  List<Price> prices;
  List<Value> options;
  factory Variant.fromJson(Map<String, dynamic> json) => Variant(
        id: json["id"],
        title: json["title"]!,
        prices: List<Price>.from(json["prices"].map((x) => Price.fromJson(x))),
        options:
            List<Value>.from(json["options"].map((x) => Value.fromJson(x))),
      );
}

class Price {
  Price({
    required this.id,
    required this.currencyCode,
    required this.amount,
  });
  String id;
  String currencyCode;
  int amount;
  factory Price.fromJson(Map<String, dynamic> json) => Price(
        id: json["id"],
        currencyCode: json["currency_code"]!,
        amount: json["amount"],
      );
}
The Variant class holds the prices for the product which is in the third level too. Therefore, we’ll need to create a separate class called Price to get the amount and the currency code for us.
The Product model above was created based on the information we wish to acquire from our Medusa API, these include the image, title, description, size, and price of our product, then we are mapping it to our incoming json response on the API.
Making an API request from sever
Now we’ve got our model ready, let’s make a HTTP call to our API.
Setting up Base Url
Create a base.dart file in the lib/api folder and paste the code snippet below. The snippet below will handle our URL dynamically.
class Base {
   static const String baseUrl = '<http://192.168.0.104:9000>';
}
Note: The URL should be replaced with your system’s IP address. T*his is because flutter doesn’t recognize [localhost](localhost).*
N.B. Flutter also doesn’t support http:// request because it sees it as an unsecured request. To fix this, head over to android/app/src/main/AndroidManifest.xml file and paste the code below under the activity tag for android
<activity

  android:usesCleartextTraffic="true" //paste this

....
</activity>
and paste this in the info.plist file located in the ios/Runner folder inside the <dist> tag
<dist>
        <key>NSAppTransportSecurity</key>
        <dict>
            <key>NSAllowsArbitraryLoads</key>
            <true/>
        </dict>

 ...
</dict>
Retrieving products from API
Create a products_api.dart file in the lib/api folder and paste the code snippet below
import 'dart:convert';
import 'package:http/http.dart' as http;
import 'package:my_store/api/base.dart';
import 'package:my_store/model/product_model.dart';

class ProductApi {
  Future<List<Products>> getAllProducts() async {
    final url = Uri.parse('${Base.baseUrl}/store/products');
    try {
      final response = await http.get(url);
      if (response.statusCode == 200) {
        var result = jsonDecode(response.body);
        var data = result['products'];

 return List<Products>.from(data.map((x) => Products.fromJson(x)));
      } else {
        return [];
      }
    } catch (e) {
      print(e.toString());
    }
    throw 'error';
  }
}
In the code above, we are making an HTTP call to our server using the http package and our base_url, and if the request is successful, we’re decoding the response which is saved in the result variable. The product object is filtered out into the data variable which is then looped through the Model.
Managing our State with Getx
We’ll need to manage our state for the incoming data. Create a productController.dart file in the lib/controller folder
import 'package:get/get.dart';
import 'package:my_store/api/products_api.dart';
import 'package:my_store/model/product_model.dart';

class AllProductsController extends GetxController {
  var getAllProducts = <Products>[].obs;
  var isLoading = true.obs;

 @override
  void onInit() {
    super.onInit();
    fetchAllProduct();
  }

 void fetchAllProduct() async {
    isLoading(true);
    try {
      var getAllProductResult = await ProductApi().getAllProducts();
      getAllProducts.value = getAllProductResult;
    } finally {
      isLoading(false);
    }
  }
}
In the code block above, we are extending our AllProductsController class with a GetxController to grant us access to the get management system, then assigning the incoming response from the API call to an observable list called getAllProduct which updates automatically when the data changes in it, finally we’re setting the isLoading value to false. The isLoading property will help in displaying the loading indicator when the product is fetching on the server.
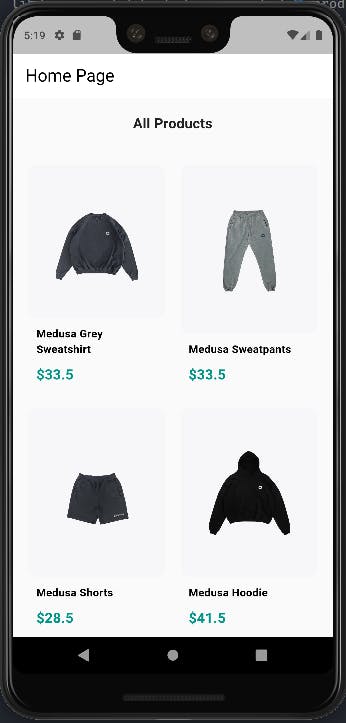
Building our Home Screen
The Home screen contains two sets of components: the Product card and the Popular products component. The product card is the UI blueprint of our individual product while the popular product dynamically populates the screen based on the data from our API.
Building Product Card Component
The product card handles the appearance of the individual product. Create a product_card.dart file in the lib/screens/home/components folder and paste the code below.
import 'package:flutter/material.dart';
import 'package:get/get.dart';
import 'package:my_store/model/product_model.dart' as model;

class ProductCard extends StatelessWidget {
  const ProductCard({Key? key, required this.product}) : super(key: key);

 final model.Products product;

 @override
  Widget build(BuildContext context) {
    return SizedBox(
        width: 140,
        child: GestureDetector(
            onTap: (){
                                //Todo: Route to Product Details Screen
                        },
            child: Column(
              crossAxisAlignment: CrossAxisAlignment.start,
              children: [
                Expanded(
                  child: Hero(
                    tag: product.id.toString(),
                    child: Container(
                        padding: const EdgeInsets.all(20),
                        decoration: BoxDecoration(
                            color: Colors.white,
                            borderRadius: BorderRadius.circular(10),
                            image: DecorationImage(
                                image: NetworkImage(product.thumbnail),
                                fit: BoxFit.cover))),
                  ),
                ),
                const SizedBox(height: 10),
                Padding(
                    padding: const EdgeInsets.symmetric(horizontal: 10.0),
                    child: Text(
                      product.title,
                      style: const TextStyle(
                          color: Colors.black, fontWeight: FontWeight.w600),
                      maxLines: 2,
                    )),
                const SizedBox(height: 10),
                Padding(
                    padding: const EdgeInsets.symmetric(horizontal: 10.0),
                    child: Text("\\$${product.variants[0].prices[1].amount / 100}",
                        style: const TextStyle(
                          fontSize: 18,
                          fontWeight: FontWeight.w600,
                          color: Colors.teal,
                        ))),
                const SizedBox(height: 10),
              ],
            )));
  }
}
In the code above, the PopularCard takes in a product parameter of type Products. This gives us access to the mapped model created earlier to populate our widgets with images, prices, and names of the products we want to display. The entire card is wrapped with a GestureDetector which gives us the clicking ability thus, on click of each card, users will be routed to the ProductDetails screen that displays the details.
N.B. The *Products model* and the image property in *DecoratedImage* both have conflicting image classes. To fix this, we had to cast the model to *model*
Building AllProducts Component
The All Products Component houses our entire body widget which displays the products to the users. Create a products.dart file in the lib/screens/home/components folder and paste the code below.
import 'package:flutter/material.dart';
import 'package:get/get.dart';
import 'package:my_store/controller/productController.dart';
import 'package:my_store/screens/home/components/product_card.dart';

class AllProducts extends StatelessWidget {
  AllProducts({Key? key}) : super(key: key);

 final productController = Get.put(AllProductsController());

 @override
  Widget build(BuildContext context) {
    return SingleChildScrollView(
        child: Column(children: [
     Text(
          "All Products",
          style: TextStyle(fontSize: 18, fontWeight: FontWeight.bold)),
 const SizedBox(height: (20)),
 Obx(
        () => SizedBox(
            width: double.infinity,
            child: productController.isLoading.value
                ? const Center(
                    child: CircularProgressIndicator(),
                  )
                : Padding(
                    padding: const EdgeInsets.symmetric(horizontal: 20.0),
                    child: GridView.builder(
                        physics: const NeverScrollableScrollPhysics(),
                        shrinkWrap: true,
                        itemCount: productController.getAllProducts.length,
                        gridDelegate:
                            const SliverGridDelegateWithFixedCrossAxisCount(
                          crossAxisCount: 2,
                          crossAxisSpacing: 20,
                          mainAxisSpacing: 20,
                          childAspectRatio: 0.6,
                        ),
                        itemBuilder: (BuildContext context, int index) =>
                            ProductCard(
                              product: productController.getAllProducts[index],
                            )),
                  )),
      ),
    ]));
  }
}
The PopularProducts component contains a Gridview.builder which automatically generates the product from the length of the getAllProduct list created in the AllProductsController controller class we created earlier. But for this to take place, we had to initialize the controller on loading PopularProduct class.
The Gridview automatically loops through the products in the getAllProduct and provides us with an index that populates the screen with each product in the ProductCard.
Building Home Components
With all the components ready, let’s build our Home Screen. Create a home.dart file in the lib/screens/home folder and paste the code below
import 'package:flutter/material.dart';
import 'package:my_store/screens/home/components/products.dart';

class HomeScreen extends StatelessWidget {
  const HomeScreen({Key? key}) : super(key: key);
  @override
  Widget build(BuildContext context) {
    return Scaffold(
      appBar: AppBar(
        title: const Text('Home Page'),
      ),
      body: AllProducts(),
    );
  }
}
The Home Screen is composed of a Scaffold that serves as the top-level element of our application. It features the App bar, which is used to display our title “Home Page” at the top of our screen, and the body which takes in the PopularProducts() widget as its value.
To check our progress so far, let’s re-run the application using the command below.
flutter run
With the progress so far, we should be able to retrieve all the products to our Home screen.
Building Details Screen
Let’s build our Details Screen by starting with its components.
Building Product Price
Our API provides us with two prices, one in EUR and the other in USD. To get them, create a product_price.dart file in the lib/screens/details/components folder and paste the code below.
import 'package:flutter/material.dart';
import 'package:my_store/model/product_model.dart';

class ProductPrice extends StatelessWidget {
  const ProductPrice({Key? key, required this.product}) : super(key: key);

 final Products product;

 @override
  Widget build(BuildContext context) {
    return SizedBox(
      height: 50.0,
      child: ListView.separated(
        itemCount: product.variants[0].prices.length,
        scrollDirection: Axis.horizontal,
        shrinkWrap: true,
        itemBuilder: (context, index) => Padding(
          padding: const EdgeInsets.symmetric(horizontal:20.0),
          child: Row(
            children: [
              Text(product.variants[0].prices[index].currencyCode.toUpperCase(),
                  style:
                      const TextStyle(fontWeight: FontWeight.bold, fontSize: 20)),
              const SizedBox(width: 10.0),
              Text('${product.variants[0].prices[index].amount / 100}',
                  style: const TextStyle(
                      fontWeight: FontWeight.bold,
                      fontSize: 20,
                      color: Colors.teal)),
            ],
          ),
        ),
        separatorBuilder: (context, index) {
          return const SizedBox(width: 10.0);
        },
      ),
    );
  }
}
Based on the code above, we are looping through the price list to get the currency code and amount which we are dividing by 100, and then displaying them in a row.
Building Size component
Finally, Let’s build our Size components to display the various sizes available with the product. Create a product_size.dart file in the lib/screens/details/components folder and paste the code below.
import 'package:flutter/material.dart';
import 'package:my_store/model/product_model.dart';

class ProductSize extends StatelessWidget {
  ProductSize({Key? key, required this.product}) : super(key: key);

 final Products product;
  Color secondary = const Color(0xFFE7B944);
  Color textLightColor = const Color(0xFF605A65);

 @override
  Widget build(BuildContext context) {
    return Padding(
      padding: const EdgeInsets.symmetric(horizontal: 20.0),
      child: SingleChildScrollView(
        scrollDirection: Axis.horizontal,
        child: Row(
          children: [
            const Text('Sizes Available',
                style: TextStyle(fontSize: 18, color: Colors.grey)),
            const SizedBox(width: 20),
            ...List.generate(
                product.variants.length,
                (index) => Container(
                    margin: const EdgeInsets.only(right: 10.0),
                    padding: const EdgeInsets.symmetric(horizontal: 15.0),
                    decoration: BoxDecoration(
                        color: secondary,
                        borderRadius: BorderRadius.circular(5.0)),
                    child: Center(
                        child: Text(
                      product.variants[index].title,
                      style: TextStyle(color: textLightColor),
                    )))),
          ],
        ),
      ),
    );
  }
}
The code above returns a Row with the title of “Sizes Available” and a List.generate widget which works exactly like the Listview.builder. The List.generate widget loops through our entire array of prices and display each product price available.
Building Product Details Screen
Finally, we get to build our Product details screen to give more descriptions of each product. Create a product_details.dart file in the lib/screens/details folder and paste the code below.
import 'package:flutter/material.dart';
import 'package:get/get.dart';
import 'package:my_store/model/product_model.dart' as model;
import 'package:my_store/screens/details/components/product_price.dart';
import 'package:my_store/screens/details/components/product_size.dart';

class ProductDetails extends StatefulWidget {
  ProductDetails({Key? key, required this.product}) : super(key: key);

 final model.Products product;

 @override
  State<ProductDetails> createState() => _ProductDetailsState();
}

class _ProductDetailsState extends State<ProductDetails> {
  Color white = const Color(0xFFFFFFFF);

 int selectedImage = 0;

 @override
  Widget build(BuildContext context) {
    return Scaffold(
        body: SingleChildScrollView(
      child: Column(
        crossAxisAlignment: CrossAxisAlignment.start,
        children: [
          SizedBox(
              width: Get.width,
              height: Get.height * 0.35,
              child: Hero(
                  tag: widget.product.id,
                  child: Image.network(widget.product.images[selectedImage].url,
                      fit: BoxFit.cover))),
          Row(
            mainAxisAlignment: MainAxisAlignment.center,
            children: List.generate(
                widget.product.images.length, (index) => productReview(index)),
          ),
 Padding(
              padding: const EdgeInsets.all(20),
              child: Text(widget.product.title,
                  style: const TextStyle(
                      fontWeight: FontWeight.bold, fontSize: 24))),
          ProductPrice(product: widget.product),
          const SizedBox(height: 10.0),
          const Padding(
              padding: EdgeInsets.symmetric(horizontal: 20.0),
              child: Text('Product Details',
                  style: TextStyle(fontWeight: FontWeight.bold, fontSize: 18))),
          const SizedBox(height: 10.0),
          Padding(
              padding: const EdgeInsets.symmetric(horizontal: 20.0),
              child: Text(widget.product.description,
                  style: const TextStyle(fontSize: 18, color: Colors.grey))),
          const SizedBox(height: 10.0),
          ProductSize(product: widget.product),
        ],
      ),
    ));
  }

 GestureDetector productReview(int index) {
    return GestureDetector(
      onTap: () {
        setState(() => selectedImage = index);
      },
      child: Container(
        margin: const EdgeInsets.only(right: 15, top: 15),
        padding: const EdgeInsets.all(3),
        width: 70,
        height: 70,
        decoration: BoxDecoration(
          color: white,
          borderRadius: BorderRadius.circular(10),
          border: Border.all(
            width: 2,
            color: selectedImage == index
                ? const Color(0xFFE7B944)
                : Colors.transparent,
          ),
        ),
        child:
            Image.network(widget.product.images[index].url, fit: BoxFit.cover),
      ),
    );
  }
}
Based on the code above, the ProductDetails screen returns a Scaffold with the body property. The body houses the Column widget which aligns its children vertically on the screen and a SingleChildScrollView widget which makes the column scrollable. The Column contains images, productImages, title, product details, and product size widgets.
We’re also building a productReview component that returns a list of our product image variations and Onclick of each of the images toggles between each image in the row.
N.B. we are also casting the product model to the name of *model* to avoid and fix the name conflict issue
Let’s resolve our Todo in the onpressed function by routing to the ProductDetails screen. Navigate back to the product_card.dart file in the lib/screens/home/components folder and add the import below.
import 'package:my_store/screens/details/product_details.dart';
Then, add the route to the GestureDetector widget in the Product screen.
onTap: () {
        //Todo: Route to Product Details Screen
        Get.to(() => ProductDetails(product: product));
},
In the code block above, we are routing to the ProductDetails screen while passing the product as a prop.
We’re done! Re-run the application but ensure the server is running, else run it using medusa develop.

What’s Next
Congrats on making it to this point. In this tutorial, we’ve covered what Medusa was, some of its features, and its Admin panel. We also built our store using Flutter, the new material design 3, and the Medusa API that we fetched our product created from and displayed to our users. You can host your admin panel on any hosting platform like Netlify.
Source Code
Here is a link to the source code
github.com/iamVictorSam/my-store.git
Conclusion
Medusa has a ton of features to implement. Ranging from the Order Tracking system to Shipping and Payment is simplified for you. They also feature Notification Bots for receiving orders from external sources like Slack. You don’t need any special skills to get started with Medusa and implement its plugins, the docs got you covered.